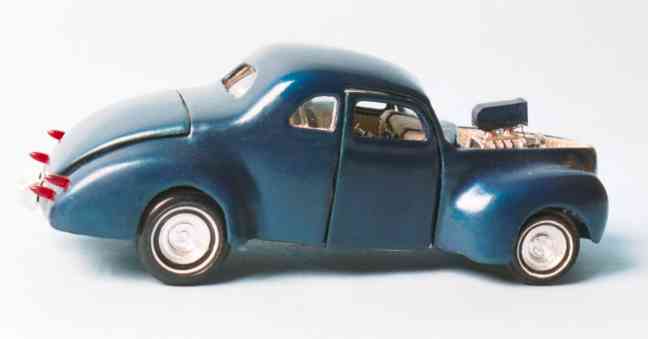
Date of original construction — around 1962 Dates of restoration — December 1997 to December 1998
Restored by: Bill Taylor Butte, Montana
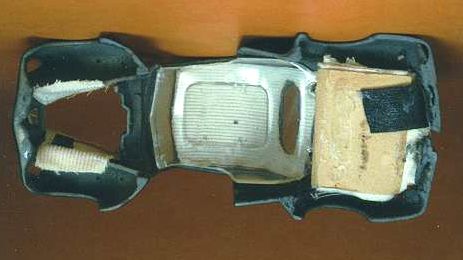
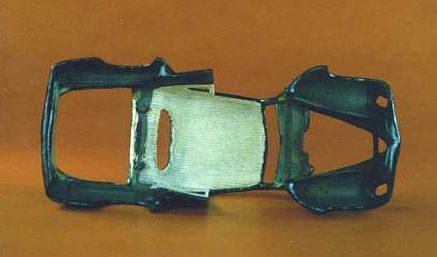
Body
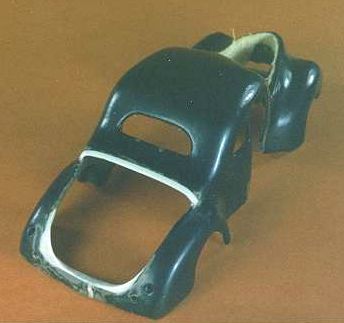
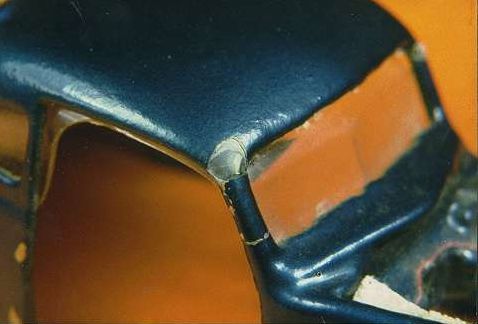
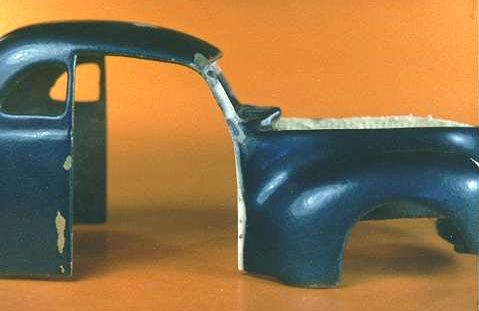
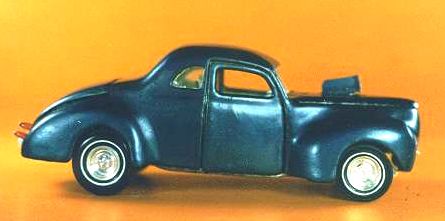
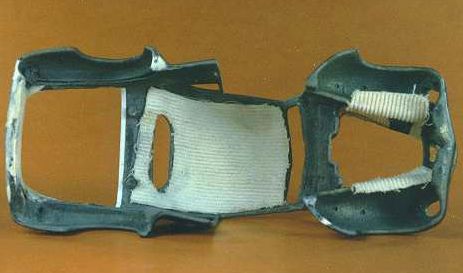
The body on this model was in pretty rough shape. The back end had broken in two, and the doors and trunk did not fit properly. There was no indication that the doors and trunk had ever been attached. The first repair I made was to reattach the two halves of the back end. The break was not clean, so I decided the two halves would have to be anchored together. I drilled the two halves and inserted a wire pin to tie the pieces together. When the pin was secure, I filled in the gap between the halves with resin.
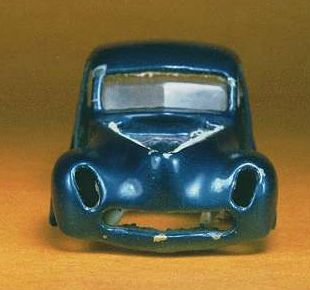
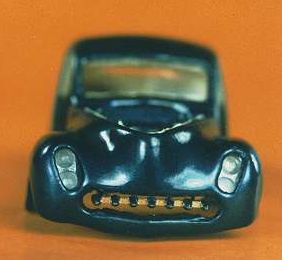
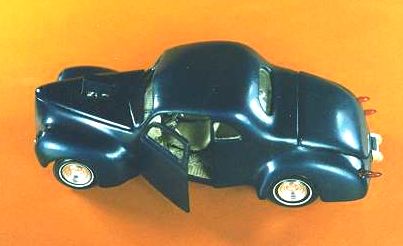
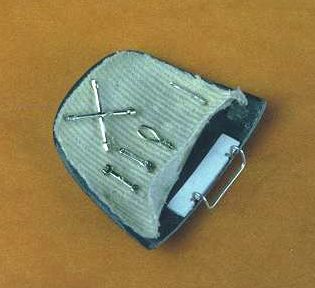
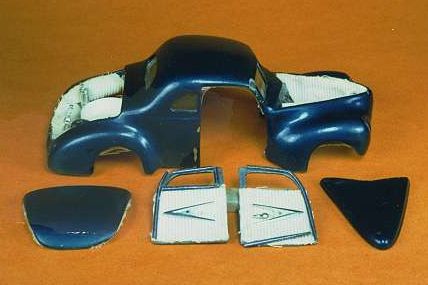
I also filled the back side of the back end with resin to achieve a more finished appearance and reinforcement for the back end. With the body back together, I decided to work on fitting the trunk.The gap around the trunk was too large, requiring filler pieces on the body in front of the trunk and at the back end. I made filler pieces from sheet plastic and blended them in with putty.While I was doing body work, I repaired an area of the roof and the front roof pillars with resin where the paint had chipped off, leaving holes in the paint. The original paint was very thick. I needed to fill the areas with resin to bring them up level with the rest of the paint, so only a thin layer of paint would be needed for touching up the spots.With this work done, I decided to fit the doors. Again, like the trunk, the gaps around the doors were too large. To fill the gaps in, I added sheet plastic to the fronts of the door openings and blended it in with resin. The doors were too long, so I removed material from the tops and bottoms to make the windows line up with the side windows and the door bottoms come out even with the bottom edge of the body. The doors were also too straight in the window areas and required heating and bending to conform to the shape of the roof area.With the trunk and doors fitted, I decided to construct hinges for the trunk and doors, so these parts would open. The hinges were made from wire bent to the proper shape. The hinges were attached to the panels by first attaching pieces of sheet plastic to the panels and then drilling holes in the panels where the sheet plastic made them thicker. The hinges were then glued into the holes, and the pieces trapping the hinges in the panels were coated with resin to more solidly secure them. The trunk and doors had been upholstered; however, the upholstery had been cut too large for the new openings and required trimming on the trunk piece and total replacement on the door panels. The door panel pieces were damaged during removal for the hinge installation, making it necessary to cut new panels. This worked out better anyway, because it allowed me to attach the interior trim pieces to the door first and then the upholstery panels. Originally, the trim pieces were attached last on top of the upholstery panels, making the panels too thick. The pieces that trap the hinges to the body were made from sheet plastic. The doors and trunk were installed later in the restoration. One interior door handle was missing. The interior door handles are actually trunk handles from the ’40 Ford kit. I furnished the missing handle from my spare parts box.The hood provided with the model had not been used, because it didn’t fit and had no hole cut in it for the blower and air scoop. To make the hood fit, I had to remove some material from the hood sides to make it sit level with the cowl. The hole for the air scoop was cut later in the restoration, when the engine was installed and the location for the hole could be determined.An area of the model that had never been completed was the headlights and grille. The headlight openings that were made looked neat but were curved, making it impossible to attach headlights.In order to attach headlights, sheet plastic pieces were added to the openings to make the openings level, so headlights could be glued in from the back. For headlights, I chose modified custom units found in the AMT ’53 Ford pickup kit. I cut them apart from their grille and installed them in the openings. I chose these parts, because they were the right vintage for this model and fit the openings well. The model had never had a grille, probably because the opening is an unusual shape. I decided to use a floating bullet grille that matched the bullet taillights. The grille is an Aurora custom parts item cut to size and mounted with wires attached to the back side of the grille and to the front edges of the engine compartment walls.
The bullet taillights required some paint removal before they could be installed. The rear license plate frame plating had been damaged by glue. To restore the plating, I removed the glue from the piece, sanded the piece smooth, and recovered the piece with BareMetal Foil. The license was touched up with yellow and black paint.
Because some body work was necessary on the model, I had to touch up the paint. I didn’t know what kind of paint or what color was originally used, so I matched the paint by mixing Testors Colors by Boyd Chezoom Teal with a small amount of Testors Model Master Ford Engine Blue. The paint was applied over a gold undercoat, as had the original paint. The hood had been painted a darker shade of blue. To match that color, I mixed Tamiya Royal Blue with black to touch up the area around the hole in the hood and on the hood sides.
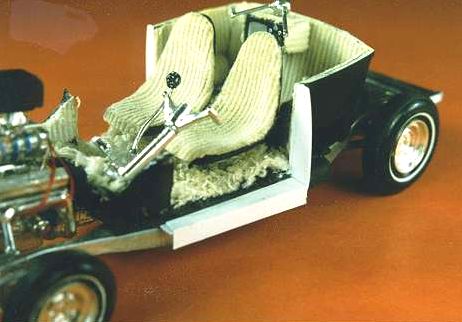
Interior
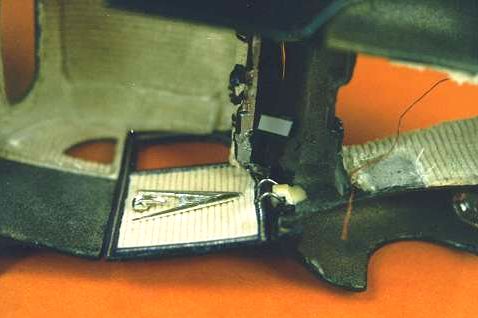
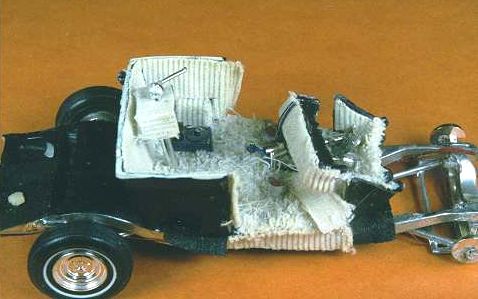
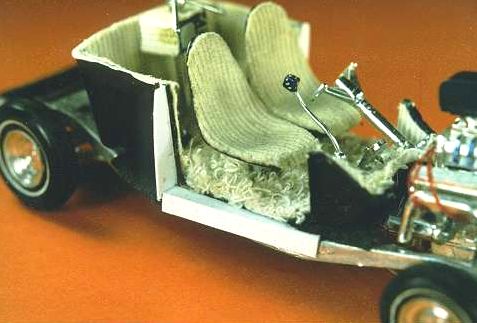
The interior of the model arrived mostly apart. Most of the upholstery had come loose and had not been cut accurately to start with. I removed the upholstery from the seats and cleaned it with Goop (a non-toxic, biodegradable cleaner).The upholstery was then cut to the proper shape for the seats, after a paper tape backing was applied to prevent the material from fraying and also to prevent glue from seeping through the cloth, when the material was reattached to the seats. The material was reattached with a combination of double-sided tape and super glue. The seats required some paint touch up as well. This was done with gloss black and Model Master Light Ivory. The bases for the seats were glued to the carpet material and were very wobbly. To make them more solid, I drilled through the bases into the floor board and glued pins in them. The seats were then epoxied to the bases, after the silver paint on the bases was touched up. The gear shift lever, steering column, and pedals had also been glued to the carpet and were not attached solidly.
I removed the parts and drilled them for wire pins. Holes were also drilled in the floor board where the pins would be inserted. Before the steering column was reattached, I had to restore the steering wheel. The missing portion of the wheel was reconstructed using pieces of styrene rod covered with BareMetal Foil. The antenna on the television had broken into three pieces, and the plating had worn off it in some places. I restored the antenna by drilling the aerials for wire pins and drilling the middle piece to accept the pins. Before the aerials were attached to the base, I recovered the base with BareMetal Foil to restore the plated finish.
The dashboard had originally been attached to the interior; however, with the addition of door hinges, the body would not have cleared the dashboard. To solve that problem, I glued the dashboard to the body, eliminating the clearance problem. This was done during the final assembly. The upholstery trim on the dashboard had come off, so I reglued the pieces, clamping them to fit the shape of the dashboard.
The glass in the windows had been installed as one piece and was unfortunately a poor fit in the side windows and the windshield. I decided to cut the windows apart and reattach them in the proper locations. Unfortunately, the windshield had cracked, so I replaced it with one from my spare parts box cut to more accurately fit the opening.Before any of the glass was reinstalled, I decided to finish the headliner upholstery, as it didn’t have pieces covering the side window areas of the roof. I cut pieces of upholstery to shape and installed them, as well as finishing the area around the rear window. All the glass was polished to remove scratches, before it was reglued in the openings. The windshield had to be cut down to fit the opening and not interfere with the placement of the dashboard and the space for the doors.The way the interior was originally built, large gaps would have existed between the interior and the doors. to solve this problem, I constructed door sills from sheet plastic, as well as pieces to fill the spaces between the interior sides and the body. The sills were glued to the interior to make the final assembly easier. The sills were upholstered to match the rest of the interior. Some detail and touch-up painting was required on the television, record player, and tape player. Gauge detail was also added to the dashboard.
Chassis
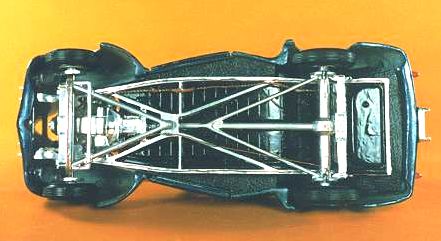
The chassis was mostly assembled; however, the front dropped axle sat too high on the frame. To drop the axle, I removed it and hollowed out the cross piece it sat on so that the axle sat farther up, touching the frame-mounted shock absorbers. The metal axles had started to rust. In fact, the front axle had rusted enough to break off on one end. I replaced the metal axles with ones from my spare parts box and sprayed them with clear coat to prevent rust, before reinstalling them. The tires required thorough cleaning. The whitewalls had worn off in spots, and I touched them up with white acrylic paint. The silver paint on the wheel backings also had to be touched up. The paint on the frame had become worn, so I re-sprayed it chrome silver, after removing the brake and fuel lines. The original brake and fuel lines were then reinstalled.
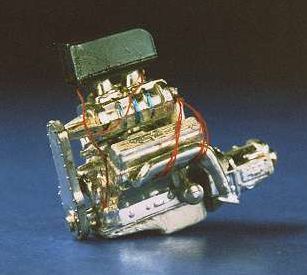
Engine
The engine arrived mostly assembled, although one cylinder head was unglued, and the basic engine assembly wasn’t very solid. I disassembled the engine and cleaned the parts thoroughly. The original spark plug wires weren’t long enough and didn’t attach to the cylinder heads. I replaced the spark plug wires with new ones made from similar weight thread . Before installing the wires, I drilled the magneto and cylinder heads to accept the wires. The blower belt was only attached at the blower, so I constructed a lower pulley shaft from a piece of chrome plastic tree. The engine didn’t mount securely in the frame, so I constructed engine mounts from chrome-plated plastic tree. Areas where plating had worn off the engine were touched up with BareMetal foil and silver paint. The scoop was reattached and touched up with the same paint that was used on the body. The fuel line to the gas tank was not attached securely to the engine, so I drilled a hole in the fuel pump to attach the line to.
Final Assembly
Final assembly was started by refitting the trunk interior to the new opening. the upholstery was re-cut to fit inside the opening, clearing the trunk lid. The front wall of the trunk interior needed slots cut in it to accommodate the trunk hinges. When the correct size was achieved, the trunk interior was glued in place, after the trunk lid hinge was attached to the body. After the dashboard was glued in place, the door hinges were attached to the body with super glue and resin. The interior areas of the body ahead of the doors were painted flat black, along with the pieces trapping the hinges to the body.
The door sills were painted with the same paint used on the body. The engine compartment upholstery had been removed earlier to be cleaned and re-cut to a more accurate shape. These pieces were reinstalled on paper tape backing to prevent glue from seeping through the upholstery. The taillights were installed at this time.
The model originally had black vinyl on the underside of the body around the frame. The original material was not cut accurately, and of course no material had been provided for the new door sills. I found vinyl close in thickness and pattern to the original and used it to cover the bottom of the trunk and the underside of the sills.
With the body done, I decided to test fit it to the frame. When I lowered the body onto the frame, I found the engine wouldn’t clear the engine compartment on the left side. The problem was the interior upholstery made the interior wall too thick in one spot, so I had to remove a small amount of upholstery to allow the engine to clear the engine compartment.
The body attached to the frame without any other problems. With the body on the frame, I attached the battery cables to their proper locations. The last piece glued on was the rear license plate. To complete the model, I polished it with three applications of Maguiar’s #3 polish.
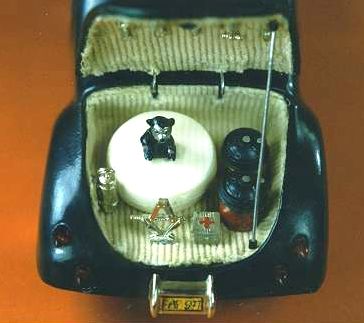
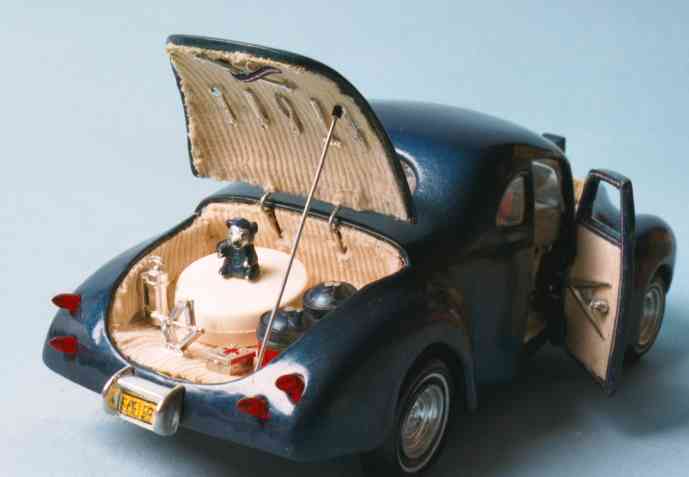
Included with the model was a spare tire cover with a stuffed bear mounted on top of it and a couple of trophies that had come apart. Some of the paint had chipped off the bear, so I retouched it with the same paint used on the body. The silver features on the bear were also touched up for a neater appearance. The trophy bases were polished and then reglued to the trophies. In order to display the trunk open with the spare tire cover in place, I had to construct a prop rod from wire with wire insulation attached on both ends to avoid damaging the upholstery.
Because this model was missing certain parts (headlights and grille), and the doors and trunk had no indication of ever being attached to the body, I don’t think this model was originally completed or actually assembled. I don’t think it could have been assembled, because of the clearance problem I encountered during final assembly. The unusual shape of the headlight and grille openings would have made finding parts that fit without modification impossible. Also the original sizing of the trunk interior would have caused the body to sit too high off the frame.
Parts Added or Replaced
headlights — added from an AMT ’53 Ford pickup custom grille
grille — added from an Aurora custom parts pack
interior door handle — added from my spare parts box
windshield — replaced by one from my spare parts box
metal axles — replaced with ones from my spare parts box
part of the steering wheel — replaced using styrene rod
radiator — part was included but wasn’t used, because it didn’t fit and wasn’t needed for the type of engine used